
Needed Tools:
- OpenCv 3.4.1 Windows self-extracting archive Download
- CodeBlocks 17.12 Without Mingw Download
- Cmake 3.12 .msi Download
- TDM-GCC-64 (tdm64-gcc-5.1.0-2.exe) Download
- Common Sense Download 🙂
Steps:
- Install and open Cmake
- Download and Extract Opencv (exe is a type of package. It will ask you the path when you open the opencv.exe) in directory c:\Opencv
- Create new directory “opencv_codeblocks” in C:\opencv
- Download and Install TDM-GCC-64 in directory C:\TDM-GCC-64 and add the path “C:\TDM-GCC-64\bin” to the environment variables. Watch below video to know how to add the the path to environment variables.
- Open CMake.
- Select path “C:/Opencv/opencv/sources” in Option Where is the source code
- Select path “C:/Opencv/Opencv_codeblocks” in Option Where to build the binaries. These are same folder we have created earlier.
- Click Build.
- Now you will see some options in table like structure. Few will be checked and few are not. So make sure about these four :
- PRECOMPILED _HEADERS : Uncheked
- MFMS : Unchecked
- IPP : Unchecked
- Builed Opencv world : Checked
- Click build again and after that click generate.
- Now in directory Opencv_codeblocks a codeblock project file will be created with extension cbp. Double click on it.
- Before building we have to configure Codeblocks.
- Go to Settings->compiler
- From Drop Down Select GNU GCC Compiler
- Select option Toolchain executables
- In option compiler’s installation directory choose the path “C:\TDM-GCC-64” Which is the path of installation of GCC compiler .
- Click on Auto Detect. And click on OK in popup.
- Go to tab Compiler Flags and Select option “Have g++ follow C++11 ISO C++ language standard [-std=c++11]”
- Click OK
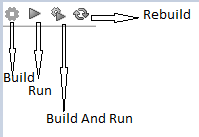
- Now From Build option in menu bar click on Build. Or See for following symbols.
- There Will Few Errors those will be shown while building :
- Error 1 : strcpy_s and strcat_s are not declared in this namespace. To resolve it use the function strncpy and strncat respectively. The format of latter is different from previous one.
- strncpy( szKey, icvWindowPosRootKey, 1024 );
- strncat( szKey, name, 1024 );
- The Error1 will be shown 4 or 5 times. So change the functions to the equivalents. Save the changes each time using Ctrl+s and click build every time you make changes to files.
- Error2 : time was not found in this scope. So resolve it add header file time.h (#include <time.h>)to the file top in which the error is shown. Save and Click Build again.
- Error 1 : strcpy_s and strcat_s are not declared in this namespace. To resolve it use the function strncpy and strncat respectively. The format of latter is different from previous one.
- Go to : Build->Select Target and select “install” option.
- Click Build option Again. The above process will take some time. On Successful build continue to following steps. Otherwise try to remove them if you can.
- Do Some copying :
- Copy opencv and opencv2 folders from “C:\opencv\build_codeblocks\install\include” to “C:\TDM-GCC-64\x86_64-w64-mingw32\include”
- Copy libopencv_world343.dll.a (number 343 can change with new release of Opencv) from “C:\opencv\build_codeblocks\install\x64\mingw\lib” to “C:\TDM-GCC-64\x86_64-w64-mingw32\lib”
- Copy Everything from “C:\opencv\build_codeblocks\install\x64\mingw\bin” to “C:\TDM-GCC-64\bin”
- Now create a new project in codeblocks and write your code with the inclusion of required header files by your code (Read Documents of OpenCV). example code :
#include < opencv2 / core / core.hpp >
#include < opencv2 / highgui.hpp >
#include < iostream >
using namespace cv;
using namespace std;
int main() {

    Mat image1, image2;
    image1 = imread("cross.png", CV_LOAD_IMAGE_COLOR);
    if (!image1.data) {
        cout << "could not find image1" << endl;
    }
    image2 = imread("cross.png", CV_LOAD_IMAGE_GRAYSCALE);
    if (!image2.data) {
        cout << "could not find image2" << endl;
    }
    cout << "opencv test" << endl;
    namedWindow("Color Image", WINDOW_AUTOSIZE);
    imshow("Color Image", image1);
    namedWindow("Gray Scale Image", WINDOW_AUTOSIZE);
    imshow("GRAY Scale Image", image2);
    waitKey(0);
    destroyAllWindows();
    return 0;
}- Before building right click on project in left side pane and select build options.
- Go to linker settings and click Add.
- Write “opencv_world343” in input box and click ok. Note that 343 can change as said above. So 343 should same as the file you copied above.
- Now you can build and run the code.