If you want to add PAD to your react native app, then it is the right place. It is the demonstration for the install-time asset delivery and not ‘on demand’ one.
First read article: Android Developers Blog: Introducing Google Play Asset Delivery (googleblog.com)
Next thing do all the settings as described in: Integrate asset delivery (Kotlin & Java) | Android Developers
Read each step carefully in the above configuration part. Below are the attached screenshots for the React Native project, in which above settings are done.
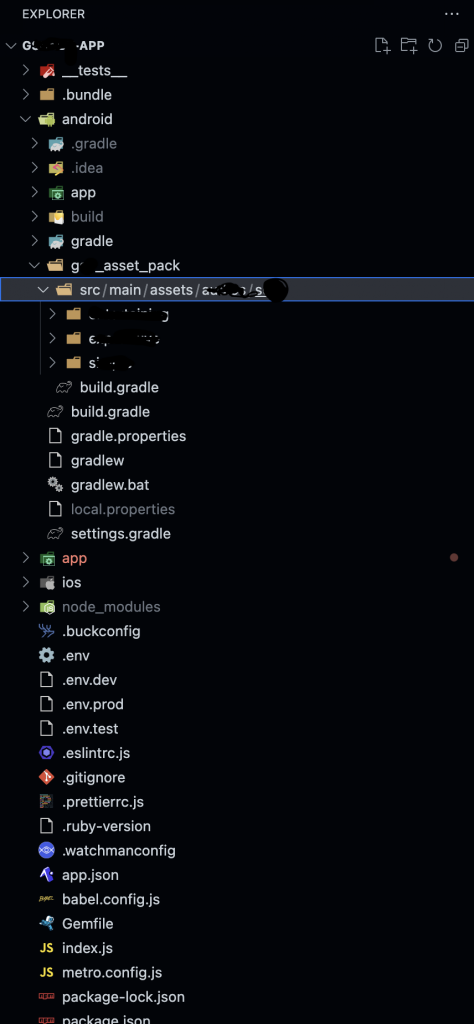
The image on left shows a folder structure that you need to create for assets. The name of g_asset_pack could be anything. The path src/main/assets must be created, and a ‘build.gradle’ file in the ‘g_asset_pack’ directory. The contents of the build.gradle are:
plugins {
id 'com.android.asset-pack'
}
assetPack {
packName = "g_asset_pack"
dynamicDelivery {
deliveryType = "install-time"
}
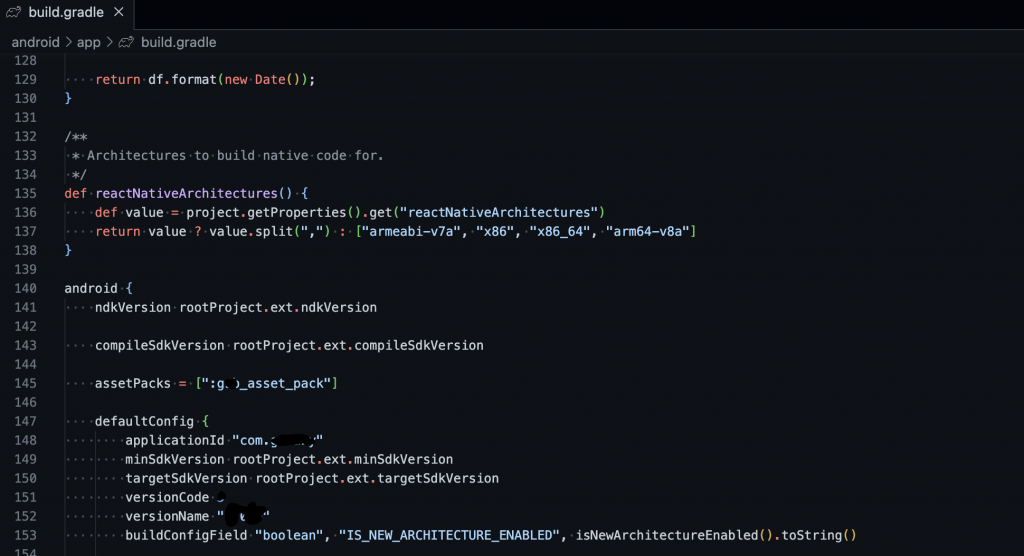
}Adding asset package to build.gradle. See the path in screenShot:
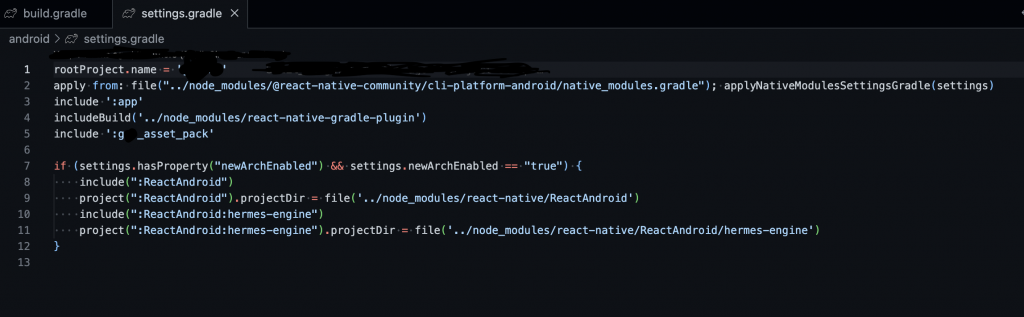
Adding asset package to settings.gradle
Now the configuration at the android side is done. You can access the assets using the following code at React native | Android | List all assets – FaltuTech.Com for debugging purposes. You may put that code in MainApplication.java or you may create a custom module. It’s your wish how want it to be done.
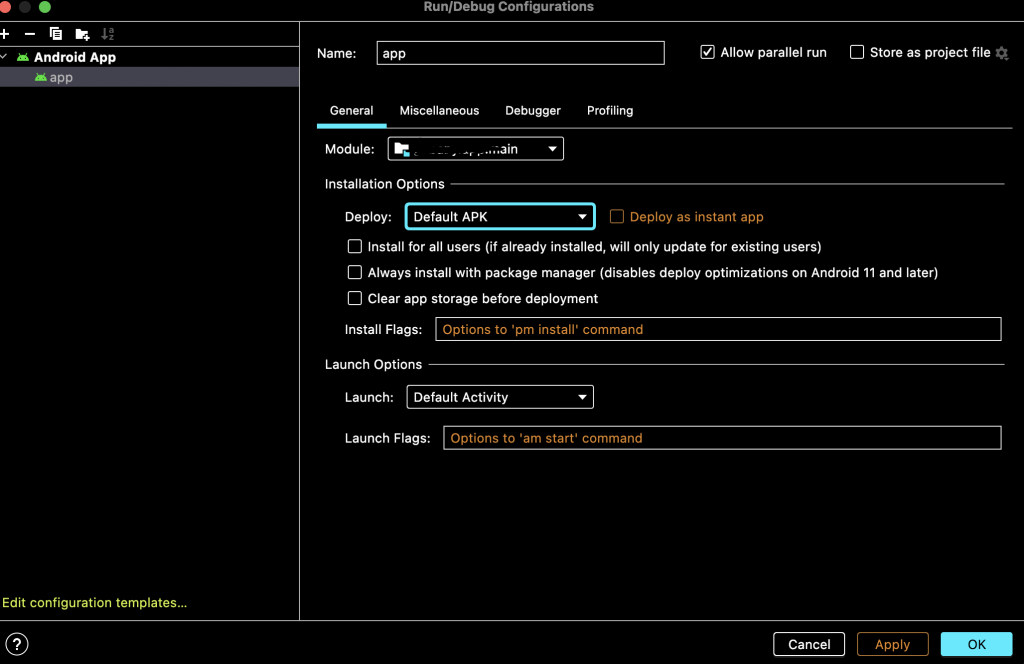
While debugging, your assets will not be available unless you change the settings in android studio (Run->EditConfigurations->Deploy) deploy dropdown to the ‘APK from app bundle’, see the screenshot below:
Now coming on the react native side, you have to take care for the both IOS and Android. Since, PAD is only for android, so you need to create two files, each for Android and IOS, so that during compilation time IOS assets are added to the package, but for android assets will be picked from asset folder.
Let’s say you name them assets.ios.ts and assets.android.ts with the following content:
// assets.ios.ts
const data = {
     image: require('path/to/asset') // you could add the android PAD asset folder path here, so that you don't need to keep two copies of assets
}
// asset.android.ts
const data = {
image: 'path/to/asset' // path in the g_asset_pack relative to 'asset' directory.
}
// Let's say you have file: g_asset_pack/src/main/assets/images/xyz.png. Then your image path must be 'images/xyz.png'To fix the typescript issue while importing above files, you can add the following d.ts file in the same directory where you have created the above files:
// This file exists for two purposes:
// 1. Ensure that both ios and android files present identical types to importers.
// 2. Allow consumers to import the module as if typescript understood react-native suffixes.
import DefaultIos from './asset.ios';
import * as ios from './asset.ios';
import DefaultAndroid from './asset.android';
import * as android from './asset.android';

declare var _test: typeof ios;
declare var _test: typeof android;

declare var _testDefault: typeof DefaultIos;
declare var _testDefault: typeof DefaultAndroid;

export * from './asset.ios';
Now, you may ask how to use that asset path we imported. The answer is it depends on the library/code which is consuming the asset. If the library support direct asset name, then you don’t have to do anything, but if it does not then you need to use ‘React-Native-fs’ to copy the files from asset folder to the ‘document’ folder and feed the ‘file:///’ path to the library.
Now, you can say that how to add the files in the APK for development purpose. For that you have to create a third file ‘asset.ts’ and import the aasets in the file as done in the ‘asset.ios.ts’ and use the asset as you do normally.
So, what you do is create a ‘asset’ folder in your ‘app’ directory. Inside that directory create a directory ‘aab_import’ and put your ‘asset.ios.ts’ and ‘asset.android.ts’ and their declarations. Put third file ‘asset.ts’ in the ‘asset’ folder. Import every asset from ‘app/asset/asset.ts’. To include the ‘asset.ios.ts’ and ‘asset.android.ts’ for aab, you need to change the build script for aab creation in ‘package.json’. The example script is:
"android_grapeseed_aab": "cd app/asset && rm -f asset.ts && cp ./aab_import/* ./ && cd ../.. && cd android && ./gradlew bundleRelease"What we have done is removed the third file ‘asset.ts’ and copied the platform specific files in ‘app/asset’. This way you can enable the PAD file. Make sure that every asset you add to PAD must be added to all three files in the specified format (for asset.android.ts it was string and for other we were requiring the files.).
Now how to detect if file path is from ‘asset’ path or development ‘require’ path. For that you need to keep some flag like production environment etc.
Humm…. that’s a lot for PAD to work properly and still we haven’t talked about dynamic import 🙂
Cheers and Peace out!!!